
I painted with a brush because I'm so lazy to using an airbrush, it was used the same method of painting the flame on the skull. But make it look more attractive by painting lines on the lava to demonstrate the characteristics of the lava flows. This method will make the base more artistic looks and suitable for a fantasy theme of this mini, in my opinion. :)
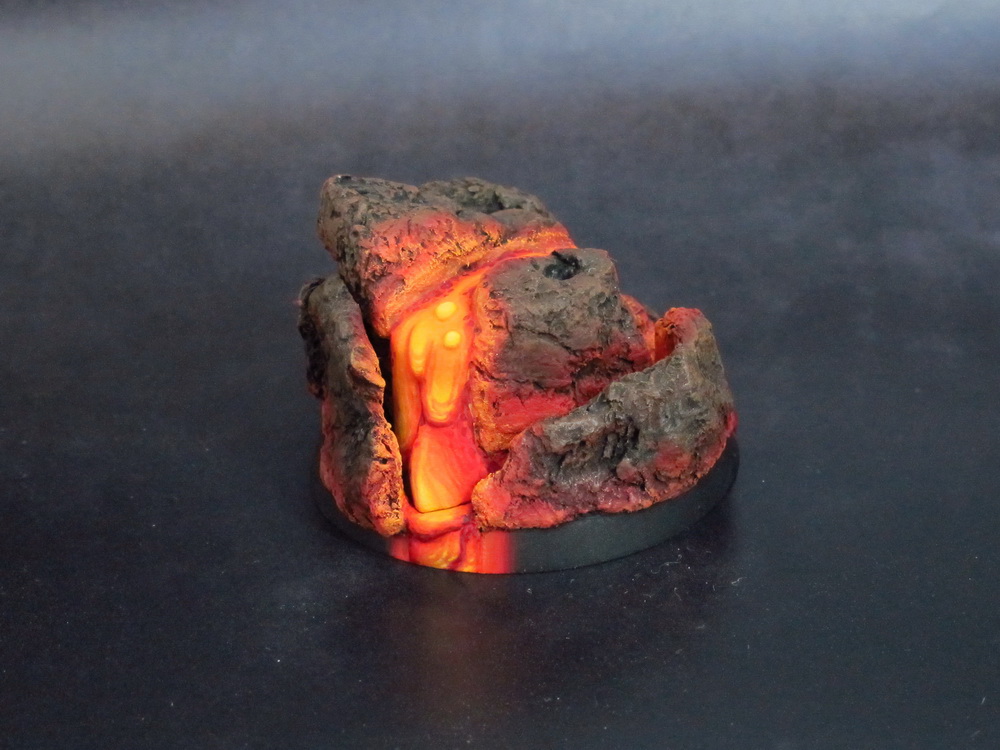
Also, the OSL technique was done with carefully of drybrush and glazing techniques. Note, The area nearest the light source is brighter than areas away. (depending on your imagination of radius of the light)
การทำฐานชิ้นนี้ ผมได้แรงบันดาลใจจาก Forgefather Vulkan โดย Ana (ลิ๊งค์สำหรับวิธีการทำฐานลาวาของ Ana ครับ Lava for Vulkan - Tutorial)
ส่วนการทำสีผมใช้การทาด้วยพู่กันทั้งหมด เพราะค่อนข้างเบื่อกับการใช้แอร์บรัช (โดยเฉพาะเวลาที่ต้องมานั่งล้างมัน :D) ส่วนสีและเทคนิคที่ใช้จะเป็นแบบเดียวกับที่ใช้ตอนเพนท์หัวกระโหลกไฟครับ แต่เพิ่มความน่าสนใจให้มากขึ้นด้วยการเพนท์ลายเส้นลงบนพื้นผิวของลาวา เพื่อสื่อถึงการไหลของลาวาและทำให้เห็นลักษณะของลาวาได้ชัดเจนขึ้น วิธีการเขียนลายนี้ อาจจะดูไปในแนวทางการเพนท์แบบงานศิลปะมากกว่าการเพนท์เพื่อความสมจริง แต่ผมคิดว่ามันน่าจะดูเหมาะกับลักษณะของงานแบบแฟนตาซีอย่างตัวนี้ครับ
ส่วนการทำเทคนิค OSL ของส่วนฐาน จะใช้การดรายบรัชก่อน และใช้การเกลซมาทาเกลี่ยอีกที เพื่อทำให้แสงที่ส่องออกมานั้นดูกลมกลืนกัน อย่างในภาพจะเห็นว่าบริเวณที่อยู่ใกล้กับแหล่งกำเนิดแสงคือลาวา จะมีสีที่สว่างและจะไล่สีให้เข้มขึ้นในบริเวณที่ห่างออกไปครับ ทั้งนี้ก็ขึ้นอยู่กับการกำหนดรัศมีของแสงด้วยครับ ว่าต้องการให้แสงนั้นส่องออกจากแหล่งกำเนิดแสงมากแค่ไหน


Fantastic paint effects.
ReplyDeleteTony
Thanks again for your kind comment :)
DeleteThis comment has been removed by the author.
ReplyDelete