Friday, December 30, 2016

2016 Year in Review

2016 is almost over and this year I managed to finish only four projects. Even though it was just a few projects I was able to do, it was great that I have tried some techniques on them and learned many things. I am very happy to finish all of them especially "Casualties of War" that I have planed to do for a long time. I hope next year I will be able to finish more projects, I still have many projects that I wanted and planned to do.

Thank you so much everyone for visiting my blog throughout the year, I really appreciate all your support and all comments. This blog is nothing without readers. Happy holidays and see you next year. :D

- Casualties of War
- US BAR Gunner
- 2nd Missouri Cavalry "Merrill's Horse", 1863 
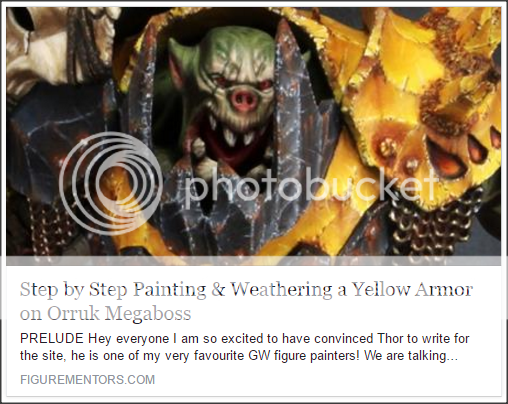
- Orruk Megaboss

ปี 2016 นี้ผมทำผลงานได้เสร็จแค่เพียง 4 ชิ้นครับ แม้ว่าจะเป็นจำนวนที่ค่อนข้างน้อยกับเวลาหนึ่งปี แต่ก็รู้สึกสนุกที่ได้ทำงานเหล่านี้ ได้ทดลองหลายๆอย่างและเรียนรู้วิธีการใหม่ๆที่จะเป็นประโยชน์ในการพัฒนาผลงานของตัวเอง และดีใจมากที่ได้ทำงานออกมาเสร็จสมบูรณ์ โดยเฉพาะอย่างยิ่ง Casualties of War ที่วางแผนเอาไว้ว่าจะทำมาหลายปีแล้ว หวังว่าปีหน้าคงจะมีเวลาทำงานให้เสร็จได้มากกว่านี้ เพราะยังมีอีกหลายๆโครงการที่วางแผนไว้และตั้งใจจะทำให้เสร็จครับ

ต้องขอขอบพระคุณทุกท่านเป็นอย่างสูงครับที่คอยเปิดเข้ามาอ่านบล็อกนี้ และแสดงความเห็นกันอยู่เรื่อยๆตลอดปีที่ผ่านมา บล็อกนี้คงจะไม่มีความหมายอะไรหากไม่มีผู้อ่านทุกๆท่าน ขอบคุณจริงๆครับ ขอให้ทุกท่านมีความสุขกับเทศกาลปีใหม่ เที่ยวกันอย่างสนุกและปลอดภัย แล้วกลับมาพบกันใหม่ปีหน้าครับ


Saturday, December 17, 2016

Saturday, December 10, 2016

My SBS tutorial on Figurementors.com

Figurementors.com has just published my article: Step by Step Painting & Weathering a Yellow Armour on Orruk Megaboss
Please take a look at their website (click on the photo below), I hope it will be useful to you in someway. :)

ตอนนี้ทาง Figurementors.com ได้ลงบทความของผมเกี่ยวกับขั้นตอนในการทำสีเกราะของงานชิ้นนี้ Step by Step Painting & Weathering a Yellow Armour on Orruk Megaboss ในเว็บของเขาเรียบร้อยแล้วครับ หากสนใจลองเข้าไปดูได้โดยกดที่รูปด้านล่างครับ ส่วนบทความในแบบภาษาไทยคงจะนำมาโพสลงในบล็อกของผมในอีกสองสามอาทิตย์หลังจากนี้ แล้วจะแจ้งให้ทราบอีกครั้งครับ

Friday, December 9, 2016

Orruk Megaboss (part 15 Finished)

It took me around five months to finish this project, spent quite a long time working on just one project but I was really enjoyed during the process. I have tried using various painting and weathering techniques on this project in order to make it look realistic as much as I could. I am very satisfied with the results especially on all metal parts that were done in NMM (acrylic) and weathered with oils.

It was a great experiment and this experience will definitely be useful with my future project. I hope all the posts from this project will be useful to you in some way as well.  I also have made a tutorial for painting the Yellow armor on this mini, more details will be announced soon. Cheers! 

ผมใช้เวลาประมาณห้าเดือนในการทำงานชิ้นนี้ ถือว่าเป็นอีกหนึ่งงานที่ใช้เวลาในการทำค่อนข้างนานพอสมควร แต่ก็รู้สึกสนุกในทุกๆขั้นตอนของการทำงาน เพราะว่าได้ทดลองนำวิธีการทำสีสำหรับยุทธยานยนต์ ทั้งการเพนท์และการเวทเธอริ่งมาลองปรับใช้กับงานชิ้นนี้ดู เพื่อให้ภาพรวมของชิ้นงานนั้นดูสมจริงมากที่สุดครับ

ส่วนตัวพอใจกับผลลัพท์ที่ออกมามากครับ โดยเฉพาะส่วนของสีโลหะทั้งหมดที่เพนท์แบบ NMM ด้วยสีอะครีลิคและเวทเธิอริ่งด้วยสีน้ำมัน และประสบการณ์ที่ได้จากการทำงานชิ้นนี้คงสามารถนำไปใช้ต่อยอดในการทำงานชิ้นต่อๆไปได้อีกในอนาคต หวังว่าแต่ละโพสที่ผ่านมาของการทำงานชิ้นนี้คงจะเป็นประโยชน์แก่ทุกท่านไม่มากก็น้อยเช่นกันนะครับ และเร็วๆนี้คงจะนำบทความขั้นตอนในการทำสีเกราะของงานชิ้นนี้มาลงให้ชมกันอีกที แล้วพบกันใหม่ครับ


Wednesday, December 7, 2016

Orruk Megaboss (part 14)

For painting the banner, I wanted to paint some freehand images or patterns on the banner to make it look more interesting, but it will look inappropriate with orruk's image in my opinion. Thus, I painted this banner as it was taken from Stormcast Eternals as a souvenir then it was painted over with orruk's symbol and decorated with other souvenirs (skulls, helmet), in order to use this banner for terrorizing the enemy. With this reason, I was able to paint the banner with complex patterns or images and not contrary with orruk's image, also made the whole project look more interesting.

At first I have planned to use this idea for painting banner on Kazhatdram bust (Galapagos Miniatures) but after decided to finish this project first, I borrowed the idea and used on this project. I am going to use this idea again on Kazhatdram but it will be different or maybe look better because I already have some experience from this project, we'll see.

สำหรับการเพนท์สีของธง เนื่องจากมันมีขนาดค่อนข้างใหญ่ ผมจึงต้องการที่จะเพนท์ลวดลายหรือรูปภาพลงบนธงเพื่อให้มันดูน่าสนใจมากขึ้น แต่ด้วยภาพลักษณ์ของออร์คที่ดูจะไม่เหมาะกับลวดลายที่ดูวิจิตรต่างๆ (ส่วนใหญ่สัญลักษณ์หรือลวดลายของออร์คจะเป็นลายกราฟฟิกเรียบๆ) ผมจึงคิดหาวิธีที่จะให้สามารถใส่ลวดลายลงบนธงได้ โดยกำหนดว่านี่คือธงที่ถูกแย่งชิงมาจากฝ่ายศัตรู (Stormcast Eternals) และถูกนำมาเพนท์สีและลวดลายทับรวมถึงตกแต่งด้วยสิ่งของอื่นๆจากฝ่ายศัตรู เช่นหัวกระโหลกและหมวกเหล็ก เพื่อนำไปใช้ในการข่มขวัญศัตรูในสนามรบ ด้วยแนวคิดแบบนี้เลยทำให้สามารถเพนท์ลวดลายที่ดูซับซ้อนลงบนธงได้โดยที่ไม่ดูขัดกับภาพลักษณ์ของออร์ค เพราะมีเรื่องราวสนับสนุนอยู่ และช่วยทำให้ภาพรวมของผลงานนั้นดูน่าสนใจมากขึ้นครับ

แนวความคิดที่นำมาใช้นี้ ในตอนแรกผมวางแผนเอาไว้ว่าจะใช้กับงานบัส Kazhatdram ของ Galapagos Miniatures แต่เนื่องจากตัดสินใจที่จะทำงานชิ้นนี้ให้เสร็จก่อน เลยยืมแนวคิดนี้มาใช้ และคงจะได้นำไปใช้อีกรอบเวลาที่เริ่มทำ Kazhatdram แต่คงจะปรับให้ดูแตกต่างออกไปหรืออาจทำให้ลวดลายดูซับซ้อนขึ้น เพราะมีประสบการณ์มาแล้วจากงานชิ้นนี้ครับ


Sunday, December 4, 2016

Orruk Megaboss (part 13)

Here is the finished base. All vegetation were painted with various Green from Vallejo. The rock platform, shield and soil were weathered with enamel from Ammo of Mig; Dark Brown Wash, Earth, Kursk Soil, and Light Dust.

I also used Slimy Grime Dark & Light from Ammo of Mig for weathering on the areas covered with moss. The dry leaves were made from crushed dry leaves, then glued on the base with diluted white glue.

In the last three photos you will see the difference from finished painting, added vegetation, and finished weathering and final touches.

ส่วนของฐานที่ทำเสร็จแล้วครับ สีของพืชพันธ์ุต่างๆใช้สีเขียวหลายๆเฉดมาทาเพื่อให้ดูมีความหลากหลายของโทนสีเขียว ส่วนของลานหิน, โล่ และพื้นดินถูกเวทเธอริ่งด้วยสีเอนาเมลของ Ammo of Mig; Dark Brown Wash, Earth, Kursk Soil, Light Dust เพื่อจำลองคราบฝุ่น คราบดินต่างๆ และใช้ Slimy Grime Dark & Light ของ Ammo of Mig เช่นกัน ในการทำคราบตะไคร่น้ำสีเขียวที่ติดอยู่ตามบริเวณที่มีมอสส์ ส่วนใบไม้แห้งตามพื้นทำจากใบไม้แห้งหลายๆสีมาบดให้ละเอียดแล้วติดลงบนพื้นด้วยกาวลาเท็กซ์ผสมน้ำครับ

ในสามรูปสุดท้ายจะเปรียบเทียบให้ดูตั้งแต่ทำสีพื้น ติดพืชพันธ์ุต่างๆลงบนฐาน และทำการเวทเธอริ่งและเก็บรายละเอียดต่างๆเป็นอันเสร็จครับ


Friday, December 2, 2016

Orruk Megaboss (part 12)

For making vegetation on the base, I used Jungle Leaves from Ammo of Mig, Static Grass and Spring Undergrowth (for making moss) from Gale Force Nine, Jungle Tuft from Army Painter, and jute rope (for making clump of grass).

The Jungle Leaves contains 2 sheets of tropical plants (3 types) from colored paper. It is easy to cut with art knife and the paper is strong enough to bend or twist and hold in position very well. I glued them on the base with white glue, then used tweezer to twist the leaves and adjust their positions to make they look natural.

สำหรับการทำพืชพันธุ์ต่างๆที่อยู่บนฐาน ผมเลือกใช้วัสดุหลายๆประเภทจากหลายๆแหล่งเพื่อให้ดูมีความหลากหลายของพืชพันธุ์ครับ โดยใช้ชุดใบไม้ที่ทำจากกระดาษ Jungle Leaves ของ Ammo of Mig สำหรับทำพืชตระกูลเฟิร์นหรือปาล์ม และใช้ผงหญ้าเทียม Static Grass และฟองน้ำฉีกฝอย Spring Undergrowth ของยี่ห้อ Gale Force Nine มาทำในส่วนของพื้นหญ้าและมอสส์ที่ขึ้นตามก้อนหิน ส่วนของกอหญ้าใช้กอหญ้าสำเร็จรูป Jungle Tuft ของ Army Painter ผสมกับเชือกกระสอบครับ

ชุดใบไม้ Jungle Leaves ของ Ammo of Mig ทำออกมาเป็นลายใบไม้สามประเภท (แถมกบและจิ้งจกให้ด้วย) ที่ใช้กรรมวิธีฉลุลายด้วยแสงเลเซอร์ลงบนกระดาษสีเขียวสองแผ่นเล็ก วิธีการนำไปใช้งานเพียงแค่ตัดส่วนที่ยึดกับแผ่นกระดาษออก จากนั้นใช้ปากคีบบิดที่ใบไม้และจัดรูปทรงตามต้องการ แล้วนำไปติดลงบนฐานด้วยกาวลาเท็กซ์แล้วจัดทรงอีกที เนื้อกระดาษที่ใช้นั้นคุณภาพค่อนข้างดีทำให้สามารถบิดและจัดทรงได้โดยไม่ฉีกขาดง่าย และคงรูปตามทรงที่จัดไว้ครับ